How to quickly and conveniently install a video recorder - a practical guide
The video recorder is a device that we find more and more parts on the windshields of cars moving on Polish roads. A dash cam is actually a video camera that records images (and sound). The video recorder records everything that is happening in front of the car, and selected models with a rear lens can monitor the traffic behind the car and serve as a rear view camera.
A car camera is not a compulsory part of a car, but most experts are clear about this equipment. It is definitely worth investing in a video recorder that will significantly help us prove someone's guilt. Video recording may constitute evidence in the case and is taken into account by the Police and courts.
Also check:
A high-quality video recorder that costs several hundred zlotys, which will record video both during the day and at night while maintaining the appropriate quality and legibility of license plates, will save a lot of money and nerves, but nothing is for free.
The video recorder is mounted on the windshield of the vehicle in the vicinity of the mirror so that it does not obstruct the field of view. The entire operation is beyond a large number of people interested in buying a video recorder.
Consumers are afraid of complicated assembly which will require disassembly of the car interior and additional costs related to it.
In the following guide, we prove that the installation of the video recorder can be quick and easy to perform.
Using the 70mai Dash Cam Pro as an example, we show how to properly install the dash cam.
Necessary elements needed for assembly
Before going to the car, you should assemble the necessary elements. In addition to the webcam itself, you need a sufficiently long cable, power supply, holder and, what is very important, a memory card in the right format - very often it is an element that we have to buy on our own.
A special gripper will also be useful for assembly, which will allow you to undermine the seals and internal parts of the car without damaging or scratching them. Sometimes car camcorder manufacturers add this element to the set, but it is not a standard - it is worth remembering and buying the appropriate accessories in advance. It is also worth equipping yourself with microfiber and some extraction gas (to degrease the glass).
The right place is half the battle
We also recommend finding a place for assembly. It is worth doing it in a well-lit but cool place. The garage will be the best. Alternatively, we can put the car in the shade or use the parking lot in front of the supermarket - even in the evening hours. It is worth keeping enough space around the car to open the front door freely.
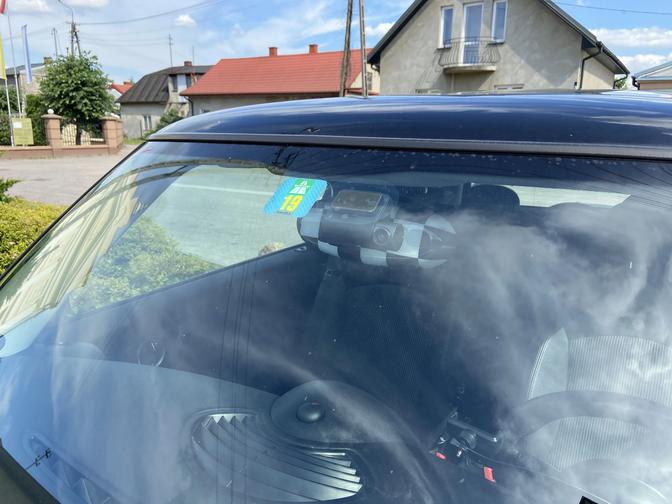
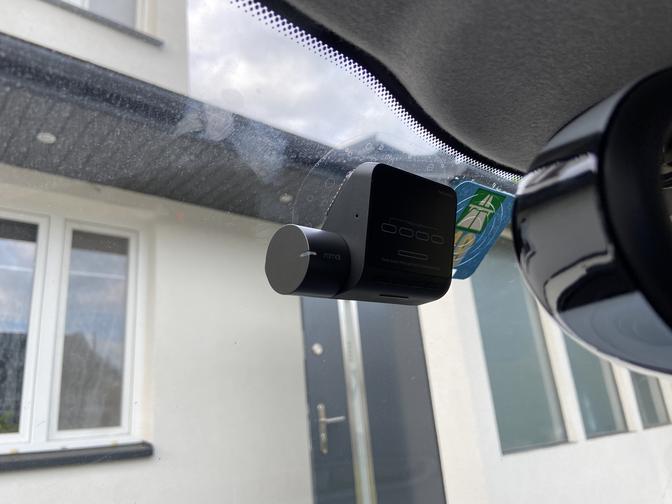
Installation in the wrong place - e.g. in full sunlight at high temperature will be tiring, frustrating, and in addition may cause the freshly glued webcam to fall off the glass.
Choosing a suitable place and degreasing the glass
Before the proper installation, it is worth trying the camera to the glass, taking into account the distance that will be required to route the cable. Note, if you have a car larger than a typical compact car, it is very possible that the cable included in the kit will be too short. If you are driving an SUV or a large limousine, carefully measure the distance between the windscreen, the A-pillar, the glove box and the cigarette lighter socket.
For the installation of the webcam, we recommend the area of the rear view mirror. If you have a car with a rain sensor, a dusk sensor or a camera supporting driving under the grille of this element, you will be able to put the cable to the video recorder. If (like us) you have a car without a rain sensor and with an ordinary mirror, you can mount the camera at the very edge of the upper windshield - it will improve visibility, and you will have no problem with excess wire.
The next step is to degrease the place where we will attach the webcam. For this purpose, we recommend extraction gasoline in combination with a microfiber cloth.
After degreasing, we can glue the handle. Note different cameras have different mounts (see the user manual for your model).
In our case, we first stick an antistatic sticker, and then a webcam holder that uses a strong double-sided tape. On the market you can also find a video recorder with a rubber mount and glue without an anti-static sticker.
After trying on the antistatic sticker, we can start sticking it.
After this step, press it firmly against the glass. Then try the webcam again and check that it does not obstruct the field of view. If everything goes according to our thoughts, we can start sticking the handle.
In the next stage, we can attach the webcam to the glass.
Cable routing to the cigarette lighter socket - 12 V
The easiest way to install it is to use a cable, power adapter and a cigarette lighter socket in the car. The vast majority of video recorders use this type of power supply. Some models allow you to connect directly to the battery using a special adapter. It is better to commission a workshop to install such a webcam.
When the video recorder is installed on the windshield, you can go to the most difficult and patient stage - cable assembly. To do this, we need to use a gripper that will allow you to lift the soffit and seals.
Plug the cable into the video recorder and, using the gripper, slide it into the soffit until it touches the A pillar.
When we are in the corner of the car, we should pass the cable through the A-pillar cover and get to the inner door seal. We use the gripper all the time to slightly undermine the elements.
In the next step, use the door seal to the bottom of the car. In the lower part, around the clipboard, we can decide how we want to route the cable.
Basically, we have two routes to choose from - through the passenger glove compartment or under the passenger seat.
It all depends on the location of the lighter and the amount of cable left.
We decided to install it under the passenger seat due to the characteristic structure of the passenger compartment, which prevents the cable from being routed easily.
For this purpose, we ran the cable further along the edge strip. In the next step, we put the cable under the rail that secures the chair (note, do not put the cable between the rails - moving the chair will cut it). Then we performed the same operation on the second rail.
The next step is to introduce the cable into the central tunnel. This is where we can collect the excess wire (if we have one).
At the next stage, we lead out the cable next to the cigarette lighter socket.
We put in a dedicated power supply - in our case, 2x USB 3.4 A (in total) and finish the assembly.
The last step is to start the ignition to check if the webcam turns on. During the first start-up, we must carry out the configuration process in accordance with the video recorder user manual.
That's all you need to do to install the video recorder in the car. The operation should take about an hour to complete, but be sure to properly prepare before starting the process. Wide and safe road.
Check how much the 70mai Dash Cam Pro video recorder costs and see our video recorder ranking that will help you choose the right model.

